***UPDATE 5/15/16: The gaming mat and scatter terrain featured in this battle report are now available in our Etsy shop! Check it out to see more pictures of the terrain (including other pieces not used during this game) and to purchase some for your own game table!***
https://www.etsy.com/shop/Terrainify
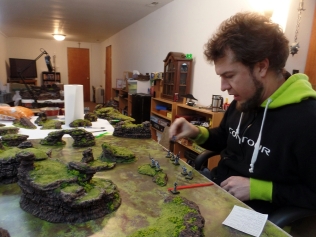
Last night we played the inaugural game using the new terrain that Mike and I have been designing for the past several months. There were two players, with me acting as ref, since I have the most experience with wargaming (Mike had played a little bit in the past, and Nick had never played a miniatures game before). Even so, it’s been quite some time since I played a miniatures game, so we opted for something on the lighter end of the spectrum: Song of Blades and Heroes, with a few of the rules from Advanced SoBH added to the mix.
Warbands were composed of 400 points each, and represented using figures from Reaper’s Warlord line. Nick won initiative and opted to take the orcs, led by Narg Bloodtusk: three each of bull orc fighters, achers, and berserkers. Mike’s warband was a band of Crusaders led by Lord Ironraven: four Templar Knights, two Ironspines armed with glaives, and two Unforgiven armed with greatswords.


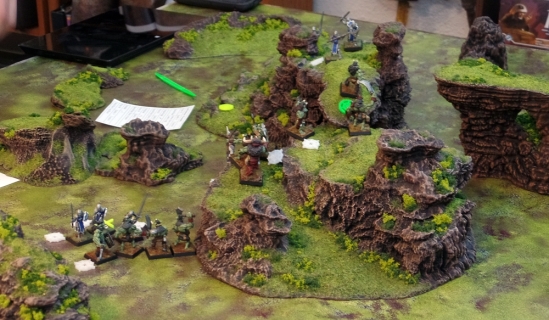
The rules for SoBH suggest a 3×3 table for standard-sized games, but we wanted to be able to use more terrain, so we played on a 4×4 table. Since this was intended as a learning game, we played a simple kill ‘em all scenario with no special objectives or win conditions.

The first several turns were relatively uneventful. Nick used free moves to get his units into position, moving his warband towards the hill in the middle of the table, with the intention of getting his archers on top to give them a height advantage. The Crusaders’ lack of ranged units meant that they would have to close for melee as soon as possible.


Once they were in position, the archers began shooting at the Crusaders. They managed to draw first blood, killing an Ironspine. Ironranven and half of his soldiers rushed towards the orcs still on the ground, the other half taking the long route to the base of the hill in order to attack the archers from the other side.

The orcs took more shots as both sides closed for melee, managing to cause Ironraven and some of his troops to recoil, but with no serious effect. Ironraven spent actions to recover from the near-miss arrow fire and to bestow his leadership bonus on his troops, enabling them to close with the enemy faster.

The first melee started at ground level, as Ironraven and his group of Templars were first to close with the orcs. The archers on the hill continued to take shots as opportunities presented themselves, but these became more limited once the melee commenced. The other group of Crusaders proceeded to make their ascent on the other side of the hill. Realizing their intent, a group of orc warriors moved to intercept and protect the archers.
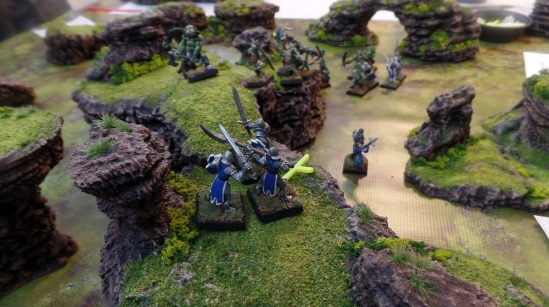
The battle on the ground was in full swing, although neither side was able to land many telling blows for quite some time. The second group of Crusaders reached the top of the hill, but were engaged on the land bridge before they could reach the archers.

The battle had now evolved into two separate scrums, a chaotic, swirling melee on the ground, and a pitched battle on the land bridge above, with the Templars trying to break the line of orc fighters and berserkers to reach the archers behind them.

There had been several reactions and turnovers by this point, and the fickle whim of the dice gods were on full display. A few soldiers on both sides fell, but still no devastating losses to this point. The first event that had a chance of significantly impacting the battle was when the remaining Ironspine lopped the head off of one of the berserkers guarding the bridge, sending it sailing over the side of the bridge in a spray of blood. Most of the remaining orcs bore witness to their friend’s gruesome demise, necessitating in morale checks. Fortunately for them, their morale held fast. In retaliation, another berserker knocked an Unforgiven from the bridge. However, the Templar landed safely on the ground, momentarily shaken, but no worse for wear.

The battle of attrition continued for several more rounds. The Templars continued to find it impossible to punch through the orc line guarding the access point atop the hill, but the casualties on the orc side began piling up at a faster rate. Eventually, Narg Bloodtusk found himself surrounded by Lord Ironraven and two soldiers and the orc warriors on the land bridge finally went down. With only Narg and his three archers remaining, Nick conceded the game to Mike.


The battle was a slog and quite literally an uphill battle for the Crusaders, but their steadfast determination carried the day. After a few rounds, Mike and Nick got the hang of the game, so I mostly sat back and observed, helping out now and then with rules clarifications, making pithy, insightful comments… and taking some time to write this battle report. Of course, as I make it a habit to surround myself with intelligent people, I wasn’t surprised that they got the hang of it quickly. This was also my first time participating in a game in which the Reaction rules from Advanced SoBH were used, and I think they definitely improve the game. Multiple failed activations become less punishing, and there is a better ebb and flow to the game.
One thing that was quite clear by the end was that standard-sized games (by point value) of SoBH should really be played on a 3×3 table. An increase from 3×3 to 4×4 might not look much bigger at first glance, but as this means going from 9 sq. ft. to 16 sq. ft., this is actually over a 75% increase in size. Mike had set up the table with intention of making the hills connected by the land bridge the center of attention, but even if it had not been set up this way, the extra space would still have most likely felt like a waste.
In the end, we managed to turn what is supposed to be a 45 to 60 minute game into a 4-hour affair(!), but that’s easily attributed to Mike and Nick being new to the game and me having to scrape off the rust from not having played SoBH, or any mini game, for so long. Bottom line, we all enjoyed ourselves in what was a great debut game for the new terrain.

Great terrain and figures. Yes making the table larger means there will be 2-3 turns of tactical maneuvering instead of just one or two. Also – the fame typically ends with failed morale rolls but if the terrain is larger, it will be less likely that troops manage to move out if the table.
I think you may also have taken such a long time because all the figures had high C values and armor/block rolls? Also, the use of spellcasters tend to shorten the game 🙂
LikeLike
Hi, Andrea. I’m honored that you took the time to comment here on my blog! You also have the distinction of posting the very first comment on this blog. 🙂
Good insight in your analysis of our game. Next time we play a standard-sized game, it’ll be on a 3×3 table. Most figures were Q3 C3, but only the Knights had heavy armor. I’ll also definitely include at least one archer or spellcaster in all of my future warbands; being limited to only melee gives a lot of control over the flow of the battle to the side that can perform ranged attacks. Hopefully I’ll get more games in with my friends, and we’ll start fielding a bigger variety of units.
Cheers!
LikeLike